Published September 13th, 2019
Learn Web Designing. The Definitive Beginners Guide
The question I get asked very often is why learn web designing when there are lots of online website builders that can help you create a website in minutes?
Learning web designing can help you land big jobs with just about any company, It can also be a huge source of passive income or you can simply just start your own web design agency as I did.
You can work as a user interface designer (UI) or work as a consultant and help companies fix website performance issues.
Web designing is fun and easy
The career opportunities are endless and web designing is fun to learn.
In fact, it has become the career of choice for most people cos it is easy to learn. Even if you’ve never written a single line of code in your entire life, you’d find building website quite easy.
It is so easy to learn and back in the days, all I had to do was save a couple of tutorials from w3schools.com on a 1.44MB floppy disk for offline study.
The funny part is, I never took a course in web design or computer science. I studied Geology for my first degree and had dreams of working with an oil company.
Those days are long gone.
These days, with internet penetration at an alarming rate, getting started with web design is a lot easier.
There are lots of free online resources and courses to choose from.
You don’t need to spend a dime. Well, I didn’t so why should you?
Today, I’ve designed and developed over 50 websites for different companies and also consult for Advertising agencies in Nigeria.
Doubt me? check out some of my recent works.
This can easily be you in the next 6 months and that is why I decided to put this guide together.
I will be showing you what you need to learn to start a thriving career in web designing.
So what is web designing?
According to Wikipedia, web designing is normally used to describe the design process relating to the front-end (client-side) design of a website.
Don’t let the term front-end confuse you. It’s just a fancy term for the visual appearance of a website.
Web designers generally focus on the design of a website.
These include;
- Layout
- Typography
- Colours
- Graphics
- User interaction design
Designing websites is fun, trust me.
You don’t need to know graphics design to be good at web designing as I will show you a little trick I use to achieve beautiful designs at the end of this article.
So without further ado, let’s jump right in.
What you need to learn to become a web designer
There are two fundamental skills required in web designing, these are HTML and CSS.
If you want to dive even further, you can learn JavaScript as well but in this article, I will focus on just HTML and CSS.
Let’s think about it like baking a cake.
While HTML and CSS can be considered the cake and icing, JavaScript can be considered as the topping.
HTML is used to create the markup for a website while CSS (Cascading Stylesheet) is used to make a website look pretty.
They all work together to enhance your web designing skills.
Let’s take a look at HTML now and then CSS.
What is HTML
HTML or Hypertext Markup Language is a language used to create web pages.
HTML elements form the building blocks of web pages and these elements are represented by <element> tags.
Think of <element> tags as small containers that hold pieces of information represented on a web page. This information is easily understood by web browsers and interpreted accordingly.
In HTML, most of the elements have opening and closing tags while a few are self-closing.
One of the great things about HTML and why it is so easy to learn lies in the naming of tags.
It really does feel like familiar territory when you think about it.
It starts with an opening angle bracket < tag name > followed by a closing angle bracket eg <html>.
HTML tags also have attributes. These attributes are used to define certain properties like class, id, href on an element.
Let’s look at some popular HTML tags and what they represent and then look at attributes later.
HTML Tags in Web Designing
Every HTML document begins with a doctype declaration like so
<!DOCTYPE html>It’s come before the <html> and lets the browser know what version the HTML document is written in.
The <html> Tag
Every HTML document starts with an opening and closing HTML tag like so <html></html>. This tag represents the beginning and the end of every HTML document.
Here is an example of the HTML tag in use
<!DOCTYPE html>
<html>
	...
	All other tags goes within the html tag
	...
</html>
As you can see, closing HTML tags requires the forward-slash / after the opening angle bracket < followed by the tag-name and then a closing angle bracket like so </html>.
If you fail to close a tag correctly, you might end up with some unexpected result.
The <head> Tag
The <head> tag represents the head section of your HTML document.
It contains important information represented by other tags about the HTML document and is not displayed by the browser.
An example of tags contained withing the <head> tag include;
- <title>: Responsible for displaying the title of the current HTML document.
- <meta>: The meta tag is responsible for display additional information used by the browser and search engines like Google, Bing and Yahoo to better understand your web page.
- <link>: The link tag is used to link external files such as CSS and JavaScript files into the current HTML document.
Let’s look at the example below;
<!DOCTYPE html>
<html>
	<head>
		<title>Learn Web Designing</title>
	</head>
</html>
As you can see from the example above, we have added the <head> tag and within it, we added the <title> tag to give our HTML document a title.
This is what it looks like when we open the document in a browser.

If you will like to follow along, simply open a text editor like Notepad on Windows or TextEdit on Mac.
Then create a new file, copy and paste the code above into it then save it as index.html (HTML files must be saved with the .html extension). You can save the file with any name you want.
If you’ve done everything correctly, you should be able to double-click the file and it should open in a browser automatically.
Moving on.
The <body> Tag
Now, this is the life of the party. The <body> tag contains all other tags that will be rendered on the web page and displayed to the user.
Let’s take a look at a quick example by using our previous progress with the <title> tag
<!DOCTYPE html>
<html>
	<head>
		<title>Learn Web Designing</title>
	</head>

	<body>
		...
		Website content goes here
		...
	</body>
</html>
Save the current changes and open the file in your browser.

Congratulations, you have now created your first web page.
I know it doesn’t look pretty yet but we will get there eventually when we cover CSS.
There are so many HTML tags but let’s look at a few that goes into the <body> tag.
Heading tag
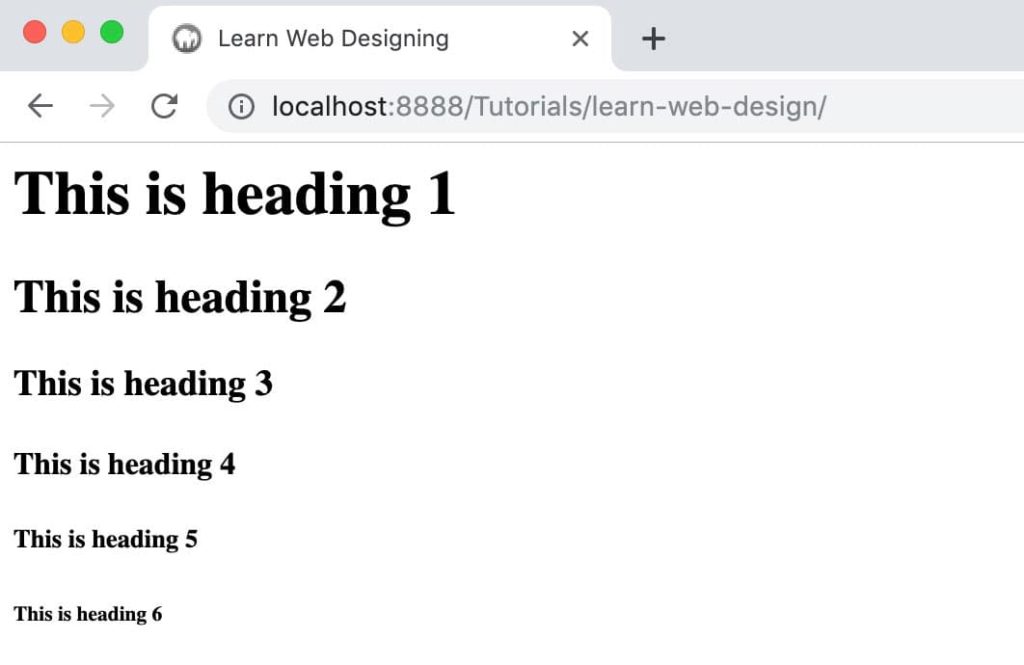
Heading tags are used to represent headings within the <body> tag. They are hierarchical and range from <h1> to <h6> with <h1> representing the most important header on the page and <h6> been the least important.
<!DOCTYPE html>
<html>
	<head>
		<title>Learn Web Designing</title>
	</head>

	<body>
		<h1>This is heading 1</h1>
		<h2>This is heading 2</h2>
		<h3>This is heading 3</h3>
		<h4>This is heading 4</h4>
		<h5>This is heading 5</h5>
		<h6>This is heading 6</h6>
	</body>
</html>
If we update our code and open it in a browser, we should get something that looks like this;
Paragraph Tag
The paragraph tag is represented like so <p>. As the name suggests, it’s used to display paragraphs within an HTML document.
Take a look at the example below
<!DOCTYPE html>
<html>
	<head>
		<title>Learn Web Designing</title>
	</head>

	<body>
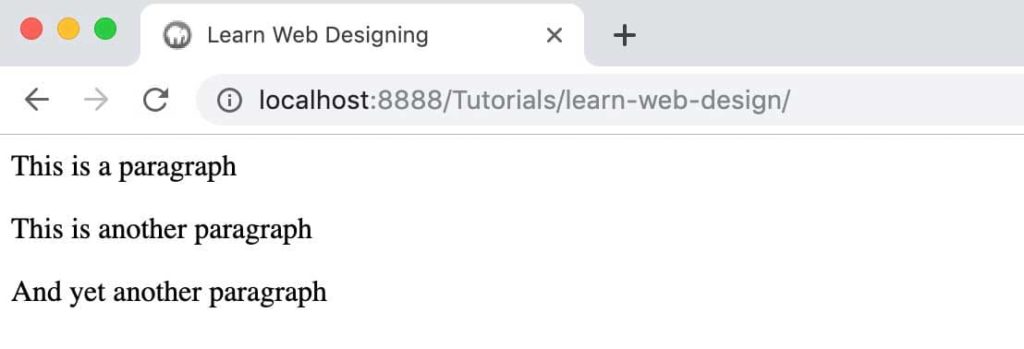
		<p>This is a paragraph</p>
		<p>This is another paragraph</p>
		<p>And yet another paragraph</p>
	</body>
</html>
Copy and paste the code above into your text editor then open it in a browser. You should get something like this
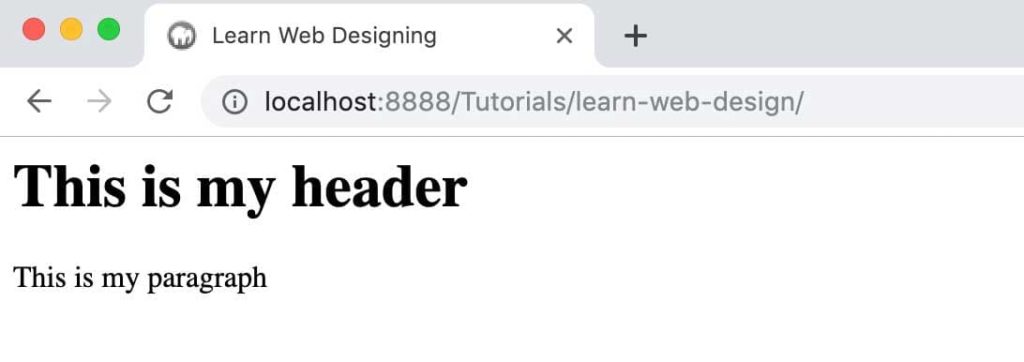
Now let’s combine the header and paragraph tag to see what we get.
<!DOCTYPE html>
<html>
	<head>
		<title>Learn Web Designing</title>
	</head>

	<body>
		<h1>This is my header</h1>
		<p>This is my paragraph</p>
	</body>
</html>
Update your text file with the code above and open it in a browser.
List Tag
The list tag is used to create a list of items. These can be ordered or unordered list.
Ordered lists are represented by <ol> while unordered lists are represented by <ul>.
Both of these lists have items which are represented by the <li> tag meaning list item.
See below an example of an ordered list followed by an unordered list in HTML.
<!DOCTYPE html>
<html>
	<head>
		<title>Learn Web Designing</title>
	</head>

	<body>
		<h1>Ordered list</h1>
		<ol>
			<li>List 1</li>
			<li>List 2</li>
			<li>List 3</li>
		</ol>

		<h1>Unordered list</h1>
		<ul>
			<li>List 1</li>
			<li>List 2</li>
			<li>List 3</li>
		</ul>
	</body>
</html>
And here’s how the browser displays both lists.
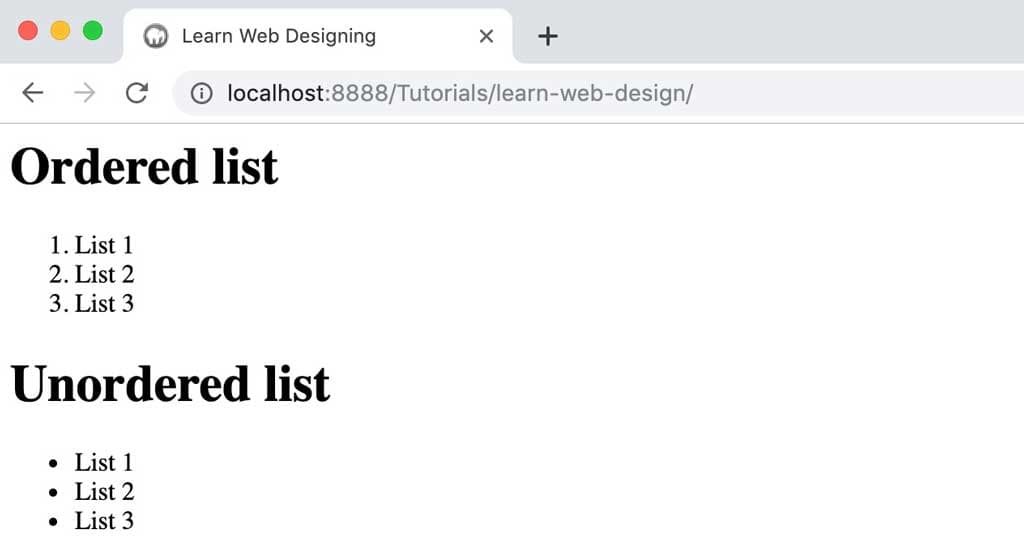
As you can see from the image above, ordered lists are displayed using a numbered index starting from 1 while an unordered list displays it as bullet points.
Anchor Tag
In HTML, anchor tags are used to define link elements and they are represented by <a>. Using the <a> tag, we can create links to other pages on our website or to an external website.
Anchor tags use the href attribute to specify were to link to. Take a look at the example below.
<!DOCTYPE html>
<html>
	<head>
		<title>Learn Web Designing</title>
	</head>

	<body>
		<a href="https://google.com">This is a link to Google</a>
	</body>
</html>
I have created an anchor tag that links to an external website, in this case, Google’s website.
You can link to another page on your website by replacing the href attribute with the filename like so;
<!DOCTYPE html>
<html>
	<head>
		<title>Learn Web Designing</title>
	</head>

	<body>
		<a href="about.html">Link to About Page</a>
	</body>
</html>
In this case, we are linking to an about page which is saved as about.html.
Div Tag
The <div> tag defines a section or division in HTML and is often used as a container for other elements in web designing.
They are very useful for layouts and grouping elements together that can then be styled using CSS.
Let’s look at a simple <div> tag in action
<!DOCTYPE html>
<html>
	<head>
		<title>Learn Web Designing</title>
	</head>

	<body>
		<div style="background-color: red">This is a div tag</div>
		<div style="background-color: grey">This is another div tag</div>
	</body>
</html>
In the code above, I have introduced the style attribute on the <div> tag to add a background colour of red and grey to our divs.

The style attributes can be added to all elements in HTML and are generally referred to as inline styles. They only affect the element they’re attached to.
Image Tag
The image tag is used to display images on a web page and it’s written as <img>.
It is one of the few self-closing tags in HTML meaning you should use </img> as a closing tag.
e.g
<img src="path/to/image/file.jpg">You only need to point the src attribute on the opening tag to the path of the file.
Let’s add an image to our example above.
<!DOCTYPE html>
<html>
	<head>
		<title>Learn Web Designing</title>
	</head>

	<body>
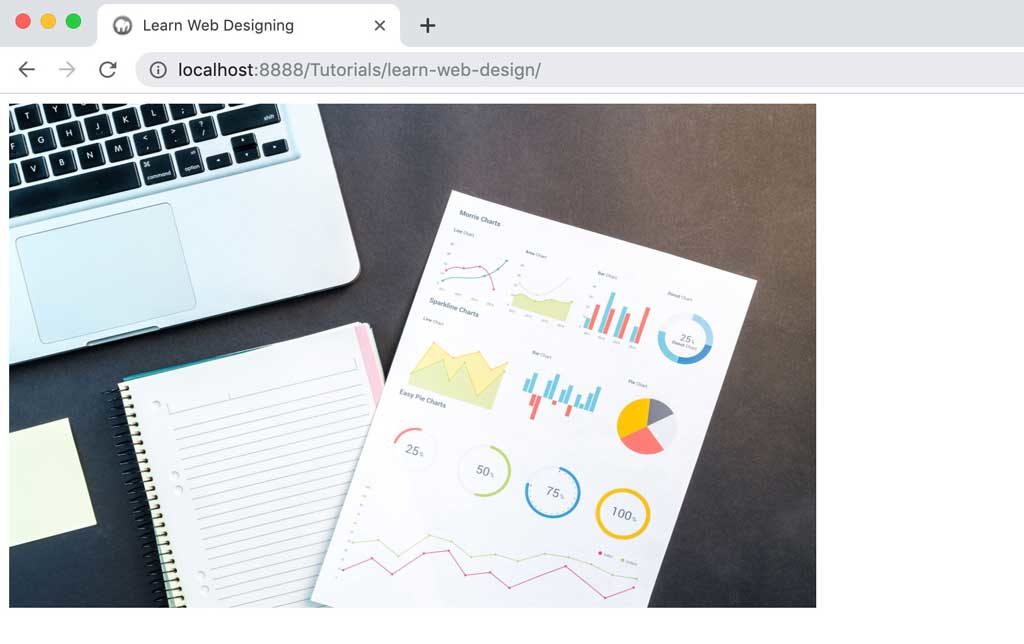
		<img src="image.jpg" alt="My image" width="640" height="400">
	</body>
</html>
Make sure the image you’re using resides in the same directory as the HTML file.
Did you notice I introduced three attributes alt, width and height? These are some of the attributes associated with the <img> tag
- alt: Also known as the alternate text provides a human-readable description of the image. Particularly useful for search engines.
- width and height: These attributes specifies the width and height of the image in the browser window.
See the results below.
There are lots of HTML tags used in web designing and I can’t cover all of it in a single article.
Also, quite a number of new HTML elements were introduced in HTML5 which is the fifth and current major version of the HTML standard.
Html elements like;
- Header <header>: Used to describe the header section of a web page.
- Section <section>: Used to describe a section on a web page.
- Article <article>: Used to describe a block of article.
- Footer <footer>: Used to describe the footer section within the web page.
- Audio <audio>: Used to embed audio on a web page.
- Video <video>: Used to embed videos on a web page.
For a complete list of tags in HTML and how each one works, please check out this resource on w3schools.com.
Attributes in HTML
Attributes provide additional information about an element and they are usually attached to the opening tag.
They come in name/value pairs like so name=”value”.
Anchor tags <a> uses the href attribute to specify a link while the image tag <img> use the src attribute to specify the source of an image file.
<a href="https://google">This is a link</a>

<img src="/path/to/image.jpg">
To learn more about attributes in HTML, check out this resource.
CSS in Web Designing
CSS or Cascading Stylesheet is a language used to describe the style of an HTML document.
It’s used to make websites look pretty.
You can use CSS inline within an HTML tag through the style attribute like so
<div style="color: red">Some text here</div>or by linking a .css file in your HTML document within the <head> tag like so
<link href="/path/to/css/file.css" rel="stylesheet" type="text/css">and also by using the <style> tag within your HTML document like so
<head>
	<style type="text/css">
	    // CSS style declaration here
	</style>
</head>
Styling elements in CSS is simple. You can style an element using its tag name or attributes.
CSS Basics in Web Designing
Earlier, I talked about HTML attributes and how they are declared name=”value”.
In CSS, there are two common HTML attributes you can declare on an element in other to style it. These are classes and ids.
CSS Properties
In CSS, you can a handful of properties like colour, font size, width, height, background properties, position, margins, paddings etc.
The list is exhaustive, please check out this resource for an updated list of CSS properties.
CSS properties are declared within a class, id or element tag like so
selector {
	property1: value1;
	property2: value2;
	property3: value3;
}
As you can see from the example above, we declare CSS styles starting with the selector name (more about selectors later) followed by an opening curly brace { then properties and value pairs followed by a closing curly brace }.
This forms a single block of styles that apply to the selector.
There is no limit to properties and value pairs a single CSS declaration can have.
CSS Classe Selectors
In HTML, CSS classes are declared using the class attribute on the HTML tag. It looks something like this class=”my-class”.
// In HTML
<div class="my-class"> .. Something goes here .. </div>
CSS classes can be declared on multiple tags. They are generally useful for adding the same style to different elements.
Classes are defined within your CSS using a dot (.) before the class name like so
.my-class {
	background-color: red;
}
Declaring CSS classes are great at keeping your CSS code lean and easier to manage.
CSS ID Selector
IDs in CSS are unique identifiers and are declared using the pound (#) symbol before the ID name.
Being unique means that it can only be declared on a single element, unlike classes that can be declared on multiple elements.
An ID in HTML is declared within the tag using the id attribute like so
<div id="my-unique-identifier"> .. Something goes here .. </div>and you declare ids in CSS like so
// Example ID declared in CSS
#my-unique-identifier{
	property1: value1;
	property2: value2;
	property3: value3;
}
CSS Tag-name Selector
To target an HTML tag, you simply call the tag-name like so.
This is very useful when you want to declare styles that affect certain HTML elements within your web pages.
Take a look at the example code below.
html{
	background-color: white;
}

body{
	font-size: 16px;
}

div{
	background-color: red;
}

ul{
	margin: 0;
}
This will target all the html, body, div and ul tag elements and apply different properties to them.
The choice of which CSS selectors to use greatly depends on what you’re trying to achieve.
As you gain a better understanding of CSS selectors and how they work, it becomes easier to know which selectors to use at any given time.
Do more research
I’ve bearly scratched the surface on how to learn web designing in this guide.
This was just to help you gain a better understanding of what skills you need to have as a web designer.
The more you research this topic, the better you will become within a short period of time.
Here are some free resources you can start with
I will also be adding more web design articles and video from time to time so be sure to stick around.
If you enjoyed this brief introduction, please subscribe to my newsletter and drop a comment.
Until next time, stay hungry for success.


